


This used picture frame that I salvaged from my MeMaw's garage sale toss pile was the perfect size for the project.

Project Materials:
- Old wood picture frame (no glass needed)
- Acrylic paint (color of choice)
- Chicken wire (enough to fit your frame)
Project Tools:
- Pliers (if frame has any unwanted nails or hardware)
- Sand paper
- Paper towel or cloth (for cleaning)
- Wire cutters
- Staple gun and staples
Instructions:
1. Wipe down frame and remove any unwanted nails, screws or hardware, so that you have a clean base to work with.


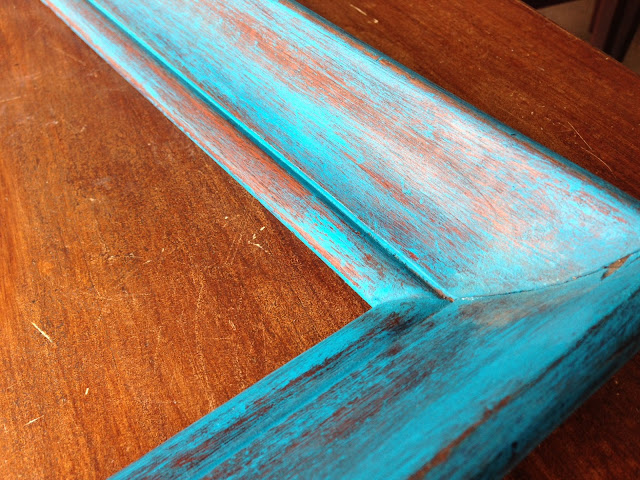
4. Paint frames with rough, quick brush strokes. No need to coat completely because the next step is sanding the paint. If done well, the result should already look a bit distressed.


Linking this project to: Shine on Fridays: One Artsy Mama, Feature Friday Link Party: Blissful and Domestic, Weekend Wrap Up: Tatertos and Jello, Show and Tell Saturday: Be Different, Act Normal, Saturday Nite Special: Funky Junk Interiors, That DIY Party: DIY Show Off, Frugal Crafty Home Blog Hop: Sneaky Spoons, Trash 2 Treasure: Kammy's Korner, Tutorial and Tips: Home Stories A to Z, Whatever Goes Wednesday: Someday Crafts, A Crafty Soiree: Katie's Nesting Spot, DIY Thrifty Thursday: Thrifty 101, Transformation Thursday: The Shabby Creek Cottage, Pin Me Link Party: Diana Rambles, Remodelaholic Link Party
Featured on:


Love, love, love this. I love the color you used too! Thanks for sharing.
ReplyDeleteLooking SUPER good. Love the way your painted it. Great color... :)
ReplyDeleteMy daughter made one of these to keep all the babies bows and headbands on. Easy and very practical!
ReplyDeletePerfect color! I love the look of yours!
ReplyDeleteSusan
Love it! Great color!!!
ReplyDelete