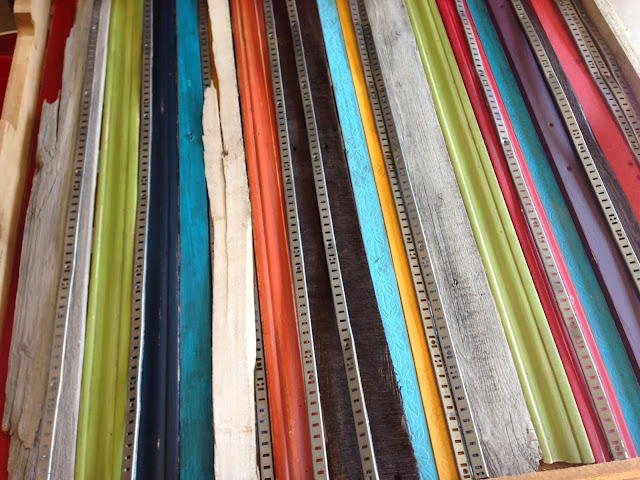
And now to introduce hands-down my favorite project of 2013 - the Meadow Lane Texas reclaimed art piece.

I did it! After a year of talking about it, I finally made it! A reclaimed art piece made of only reclaimed scraps from our house remodel - trim, base boards, shelving hangers, fence wood, pallets, paneling, old screws, etc.
I took a ton of photos throughout the process, so being as brief as I possibly can, here's my beloved mixed media art project, inspired by artist Dolan Geiman.
I started with a wood pallet that was unfortunately in bad shape and was not square (which is the shape I needed).
So to make it square, I whipped out the Sawzall to cut it down - my first time ever using the tool.
I hated it! Not my favorite tool, and my cuts sucked.
In the end though, trimming the pallet gave me the square shape I needed for my art base.
Next, I laid out my scrap material on the unfinished pallet to (a) make sure I had enough pieces (b) make sure everything fit and (c) measure the sides of my base.
Once measured, I detached the cross boards (made of TBD material) from another not-so-great condition pallet we had to use them as additional sides for my pallet.
I just had to cut the boards to fit my square base... using a miter saw.
Ok, I've known what a miter saw was for quite some time. I knew how it was used, watched people use it, etc, but I had never actually used it by myself. (One step at a time!) Easy tool. I am happy to announce that Jeff is officially pardoned from having to make cuts for me in the future (well, may be not all the time).
With a little wood glue and clamps to help set the new sides, I officially had my square pallet base for the project.
Now, with my handy dandy miter saw, I cut each scrap piece to fit into my square.
Square - check. Reclaimed inside - check. Next was life, life via color!
I painted each scrap piece with assorted vibrant colors of acrylic paint. For an extra touch, I rubbed them with a ridiculously light coat of dark wood stain and then lightly sanded them.
I couldn't give the same treatment to my ugly brown-painted metal strips, so I just spray painted those with metallic spray paint.
My art piece was already looking awesome, and it wasn't even done.
At this point it was on to part two of the project - the top half - which I'll share in my next post.
(View part two of the project
here.)
Featured on:
Linking to: Funky Junk Interiors - Party Junk 211, Be Different Act Normal - Show and Tell Saturday, DIY Show Off - That DIY Party, Tater Tots and Jello - Link Party Palooza, Fingerprints on the Fridge - The Weekly Creative Link Up
XOXO
Kendra
Don't forget to visit my shop, Kitsy Co!


Wow! This looks awesome. And you braved the saws! Personally I have an abnormal fear of electrical tools I try to slowly overcome...
ReplyDeleteI love it! Even more than that...I WANT it!! Beautiful job!
ReplyDelete