You've all seen them, whether in your own home or someone you know, drabby brown laminate bookshelves.
No offense to anyone who still uses them, but the two bad boys above that we inherited with the house needed a face lift just like everything else around our house.
My original goal was to paint them and mod podge scrapbook paper on the backing, but I changed my mind and decided to use wallpaper instead. Here's a rundown of the project.
First, we decided we should spray paint them (without priming). After wasting through 4 or so cans of spray paint though and seeing my never-ending spotty results, I realized that the spray paint method was a terrible idea.
Then I decided to prime and paint the shelves...
...but only by using the most nifty sponge rollers ever.
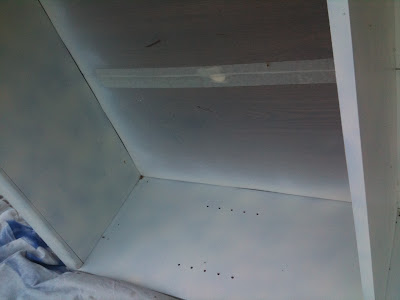
After making it through the prime and paint stage, I then brought the shelves inside to apply the wallpaper. The wallpaper I used was a roll of $20 Allen + Roth Spanish Tile Pattern paper from Lowes.
Step 1 was to measure the surface areas of the bookshelves’ backings in order to determine the correct amount of paper to cut. The most tedious part while cutting was aligning the pattern to ensure that it would flow seamlessly once applied.
Since I needed four pieces for each shelf, I made sure to label the corners on the backside of the paper so that I would not forget which piece went where and to which shelf.
As far as application, I just followed the directions on the wallpaper packaging. The kind I used called for submerging the wallpaper strips in water, letting them rest for 5 minutes, and then applying them to the "wall," making sure to flatten out any bubbles while doing so. Since I was applying it to a small surface, I just used a credit card to flatten it out.
Then, to clean things up, I used a razor to cut off the excess wallpaper around the edges. It was much easier to do this after the wallpaper had dried.
And after I thought that the bookshelf project was complete, assembling the shelves with the new extra layer of paint proved a bit disastrous. The extra thickness caused the shelves not to fit right, which scraped off some of the paint.
Oh well, they were cheap shelves, so I didn't have a heart attack. I touched up the paint and added the refinished pair to our office.
Not too shabby for a pair of shelves that were free! For the meantime, I think I'll enjoy them in my office, focus on the remodel and take a small break from DIY furniture :)
Featured on:
Linking this post to:


Great job! I love that wallpaper patter. It's amazing how we can refurbish something that otherwise would have been discarded. Now following, would love for you to visit and follow me too :)
ReplyDeleteHugs, Tanya
Now that, my friend, is where wallpaper belongs! I've been knee deep in "green" methods, chemicals, scrapers and the like trying to get the gold wallpaper off our dining room walls. This post lessened my hatred and bitterness for wallpaper, however. VERY cute bookshelves. Rock on!
ReplyDeleteBobi
http://westernwarmth.blogspot.com
Wow, this came out great! That's so funny that you crashed and burned on the spray paint...I did too (just posted about it this week!) I'm thinking about wallpapering the back of our family room shelves and if I do, I'll reference this post. I'm most concerned about lining up the pattern correctly. Thanks for the inspiration!
ReplyDeleteAimee
Oh My Goodness - i have the EXACT same shelves all over my house. i have 3 in the kid's playroom and one in my son's bedroom. You have completely inspired me to paint the one in my son's room red! Thanks
ReplyDeleteSO SO cute Kenners! Love them! :)
ReplyDeleteNICE job!!! I reeeeally need to transform some of ugly book shelves!!! These are great inspiration!
ReplyDeleteI linked your post to mine here: http://www.decoryouadore.com/2013/01/now-thats-using-your-nooks-and-crannies.html Your ugly bookshelf inspired my new home office workspace; so thank YOU!
ReplyDeleteWould you HAVE TO paint and prime? I'm paperin all over....?
ReplyDeleteNot necessarily, especially if you're papering all over. Priming just helps your paint go further and enables you to paint less coats over dark colors. I especially did it because the original plan was to spray paint (fail). However, that is totally up to you. A lot of paint today is paint/primer in one, which also eliminates the need to prime.
DeleteYes, not priming was a bad idea. Priming is necessary if you want to achieve a flawless finish. Particularly with wood; it will initially absorb most of your paint, causing a ruined finish and requiring more coats of paint. Latoya Quinn @ Texture Coating
ReplyDeleteThat makeover is so awesome! One wouldn’t think it’s still the same bookshelves. Who needs to buy a new one, when a little paint and creativity is enough to get you a furniture that’s as good as those you see in stores? Haha! Thanks for sharing your amazing DIY skills!
ReplyDeleteHubert Cole @ Pear Workplace Solutions
İsmetpaşa
ReplyDeleteKnidos
Sanayi
İhsaniye
Bostanlı
B3İ
Sakarya
ReplyDeleteKayseri
Van
Konya
Samsun
J3OWPW
ankara
ReplyDeletesakarya
tekirdağ
kastamonu
amasya
H47YE5
van
ReplyDeleteelazığ
bayburt
bilecik
bingöl
OHY
https://titandijital.com.tr/
ReplyDeletedenizli parça eşya taşıma
sinop parça eşya taşıma
artvin parça eşya taşıma
antep parça eşya taşıma
XV34
kastamonu evden eve nakliyat
ReplyDeleteantep evden eve nakliyat
balıkesir evden eve nakliyat
erzincan evden eve nakliyat
ankara evden eve nakliyat
SO1KNT
çankırı evden eve nakliyat
ReplyDeletekırşehir evden eve nakliyat
kütahya evden eve nakliyat
hakkari evden eve nakliyat
antalya evden eve nakliyat
V1Q3
uşak evden eve nakliyat
ReplyDeletebalıkesir evden eve nakliyat
tokat evden eve nakliyat
kayseri evden eve nakliyat
denizli evden eve nakliyat
JL734
hatay evden eve nakliyat
ReplyDeleteısparta evden eve nakliyat
erzincan evden eve nakliyat
muğla evden eve nakliyat
karaman evden eve nakliyat
MTZİFB
urfa evden eve nakliyat
ReplyDeletemalatya evden eve nakliyat
burdur evden eve nakliyat
kırıkkale evden eve nakliyat
kars evden eve nakliyat
ZL0HRW
8D211
ReplyDeleteBurdur Evden Eve Nakliyat
Siirt Parça Eşya Taşıma
Amasya Lojistik
Hakkari Lojistik
Samsun Evden Eve Nakliyat
BB952
ReplyDeleteEryaman Parke Ustası
Manisa Parça Eşya Taşıma
Çankırı Parça Eşya Taşıma
Gümüşhane Lojistik
Pursaklar Fayans Ustası
Konya Evden Eve Nakliyat
Çerkezköy Çelik Kapı
Ordu Lojistik
Ünye Marangoz
1FE44
ReplyDeleteBitcoin Nasıl Alınır
Sivas Evden Eve Nakliyat
Vindax Güvenilir mi
Bilecik Lojistik
Muğla Şehirler Arası Nakliyat
Malatya Parça Eşya Taşıma
Çerkezköy Buzdolabı Tamircisi
Hakkari Şehir İçi Nakliyat
Mardin Evden Eve Nakliyat
ADC31
ReplyDeleteÇerkezköy Bulaşık Makinesi Tamircisi
Binance Güvenilir mi
Siirt Şehir İçi Nakliyat
Vector Coin Hangi Borsada
Kocaeli Şehirler Arası Nakliyat
Batman Lojistik
Muğla Şehirler Arası Nakliyat
Bursa Şehir İçi Nakliyat
Karaman Lojistik
C706D
ReplyDeletereferans kimliği nedir
resimli magnet
resimli magnet
binance referans kodu
binance referans kodu
B675F
ReplyDeleteaksaray canlı sohbet siteleri
tekirdağ sesli sohbet sesli chat
adıyaman kadınlarla rastgele sohbet
mobil sohbet siteleri
bursa yabancı canlı sohbet
eskişehir bedava sohbet
amasya sesli sohbet odası
erzurum mobil sohbet odaları
mardin kadınlarla sohbet
90020
ReplyDeletemobil sohbet
konya sesli sohbet sitesi
şırnak ucretsiz sohbet
manisa rastgele görüntülü sohbet ücretsiz
trabzon en iyi ücretsiz sohbet siteleri
hakkari canli sohbet bedava
hakkari en iyi rastgele görüntülü sohbet
ardahan rastgele sohbet odaları
bingöl en iyi görüntülü sohbet uygulaması
12672
ReplyDeleteyabancı canlı sohbet
antep canlı sohbet siteleri ücretsiz
Sakarya Yabancı Sohbet
van rastgele görüntülü sohbet ücretsiz
karabük sesli sohbet odası
Muğla Telefonda Görüntülü Sohbet
Kastamonu Ücretsiz Sohbet Siteleri
Burdur Ücretsiz Sohbet Uygulaması
Kırşehir Canli Sohbet Bedava
72754
ReplyDeleteMardin Mobil Sohbet Odaları
bedava sohbet chat odaları
canlı sohbet siteleri
canlı görüntülü sohbet
kilis canlı sohbet odası
Mersin Mobil Sesli Sohbet
Balıkesir Sohbet Odaları
mobil sohbet odaları
Sivas Ücretsiz Sohbet Siteleri
3E83D
ReplyDeleteGate io Borsası Güvenilir mi
Bitcoin Yatırımı Nasıl Yapılır
Binance Referans Kodu
Meta Coin Hangi Borsada
Parasız Görüntülü Sohbet
Clubhouse Takipçi Satın Al
Mefa Coin Hangi Borsada
Floki Coin Hangi Borsada
Bitcoin Nasıl Kazılır
CF76A
ReplyDeleteaave
arbitrum
poocoin
poocoin
shiba
pancakeswap
dcent
trezor suite
eigenlayer
4BF62
ReplyDeleteçay ağacı sabunu
gül sabunu
keçi sütü bal sabunu
binance
kaldıraç ne demek
okex
kefir sabunu
https://toptansatinal.com/
bitget
12EDA
ReplyDeletecopy trade nedir
coinex
bitcoin ne zaman çıktı
filtre kağıdı
bkex
kripto ne demek
bingx
okex
bitexen
42AAA
ReplyDeletetelegram kripto para
kucoin
binance referans kimliği nedir
bybit
okex
bybit
bingx
binance 100 dolar
canli sohbet
83E5C
ReplyDeletecopy trade nedir
bitexen
filtre kağıdı
papaya
bingx
bitcoin nasıl üretilir
kraken
kredi kartı ile kripto para alma
mexc
rghfhytuujyijy
ReplyDeleteشركة تنظيف افران بجدة
تنظيف خزانات بخميس مشيط J9XXVjQTfh
ReplyDelete36CFBB21A9
ReplyDeleteskype kameralı şov
شركة مكافحة النمل الابيض بخميس مشيط 1cGCRYK7WG
ReplyDeleteشركة صيانة افران ON424e0BiN
ReplyDeleteشركة مكافحة حشرات 4zo4jcToqD
ReplyDeleteشركة عزل اسطح بالخبر eFYtNOMcvD
ReplyDelete